Learning each and every day

My quest to edify myself a bit every day

Archive for the category “Uncategorized”

Getting sidetracked

Whoa! Has it really almost been a month since my last project was completed! Well, I DID say the next project was a biggie. It’s the final stage of my desk organization, and really, it’s going quite well. Ostensibly, that’s what this post is supposed to be about. Alas, I got sidetracked organizing the school room. So really, this post is about the school room. Although, I could really say that it’s about mice. Yeah, you read that right, mice. Confused yet?

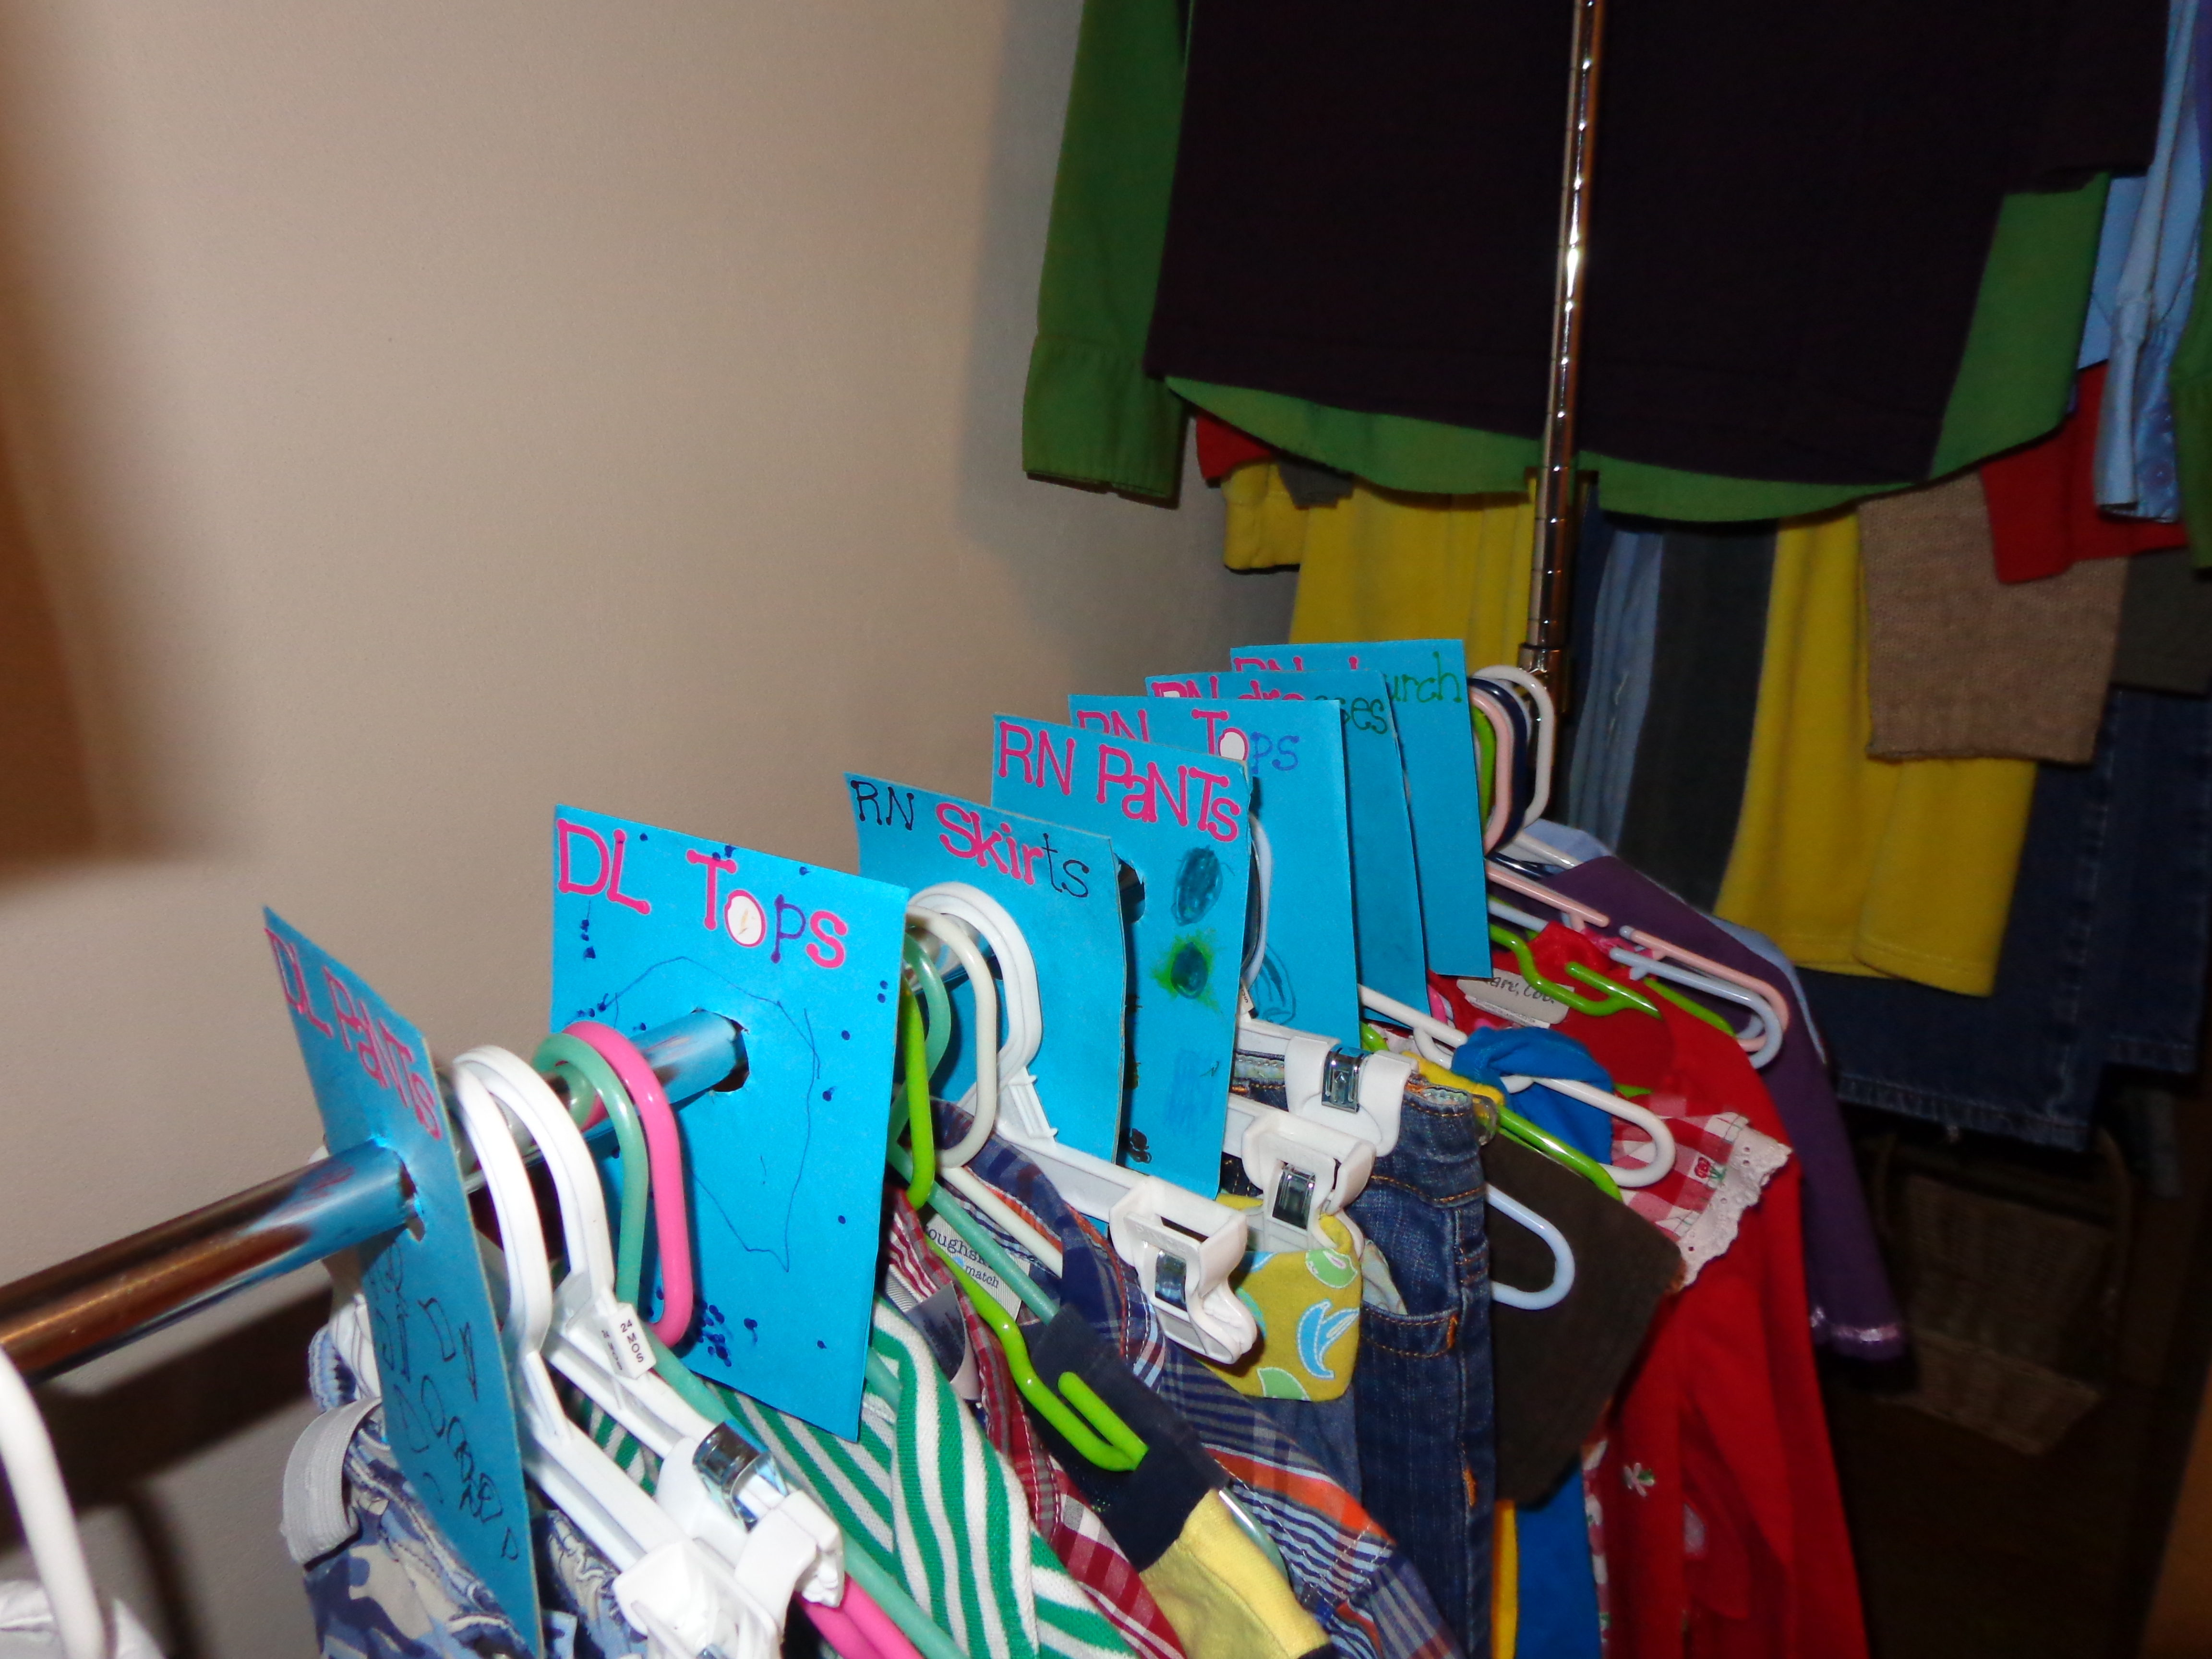
We have alot of little people in our family, and as such, hand-me-downs are a major player in the wardrobe game. In order to not lose my mind, I came up with a system about 3 years ago to organize all of the hand-me-downs. We have 4 dressers and each drawer is labeled. Now that fall is upon us, all I have to do is go to the appropriate drawer (i.e. 3T long-sleeved) and pull out the clothing. I got inspired a week ago to start figuring out what clothing the babes had and what would need to be purchased/sewn. The first thing I pulled out was a really nice Ralph Lauren sweater I had bought at a yard sale. Parts of the sweater looked shredded and I thought, “Oh no! Did this get messed up in the wash and I never noticed?” Then my next thought was, “Shoot! Did an animal eat the sweater?” The drawer was filled with other sweaters and I quickly checked them all. Most of them were fine. There was, however, one that was most certainly not. A hole the size of a large grapefruit had been chewed out. At that point, I knew it was the work of a mouse and I was NOT pleased. Then, panic set in. The next drawer over was filled with all of the recycled wool longies I had made. I opened the drawer and pulled out a pair of pants, and sure enough, a big clump of fluff fell out . . . the mouse had been scavenging materials to make a nest. That wasn’t the only thing I found. My nose was met with an unpleasant odor which caused me to be suspicious of what I would find, which in turn sent me in search of a pair of gloves. Long story short, after going through the drawer, I found that the damage to the pants was minimal and they were all still usable. I also found four, small, dried up and practically mummified baby mice. It was gross and sad all at once. The ruined clothing was all for naught. . . .none of the baby mice made it.

Anyway, so all of the clothing got washed, and then I needed a plan for storing the clothing as I didn’t want a repeat of this in the spring or next fall. Rubbermaid totes to the rescue! Anything that is knit or crocheted now lives happily in a sealed tote.

But what does this have to do with the school room? Right. I’m getting there. The totes are great, but they don’t fit inside the dressers, so I had to find another location for them. Enter, the school room closet. The problem here was that the closet space was a catch all for all of the school supplies. I went into the school room, which also doubles as DH’s office, and this is site that met my eyes.

rick's office b4

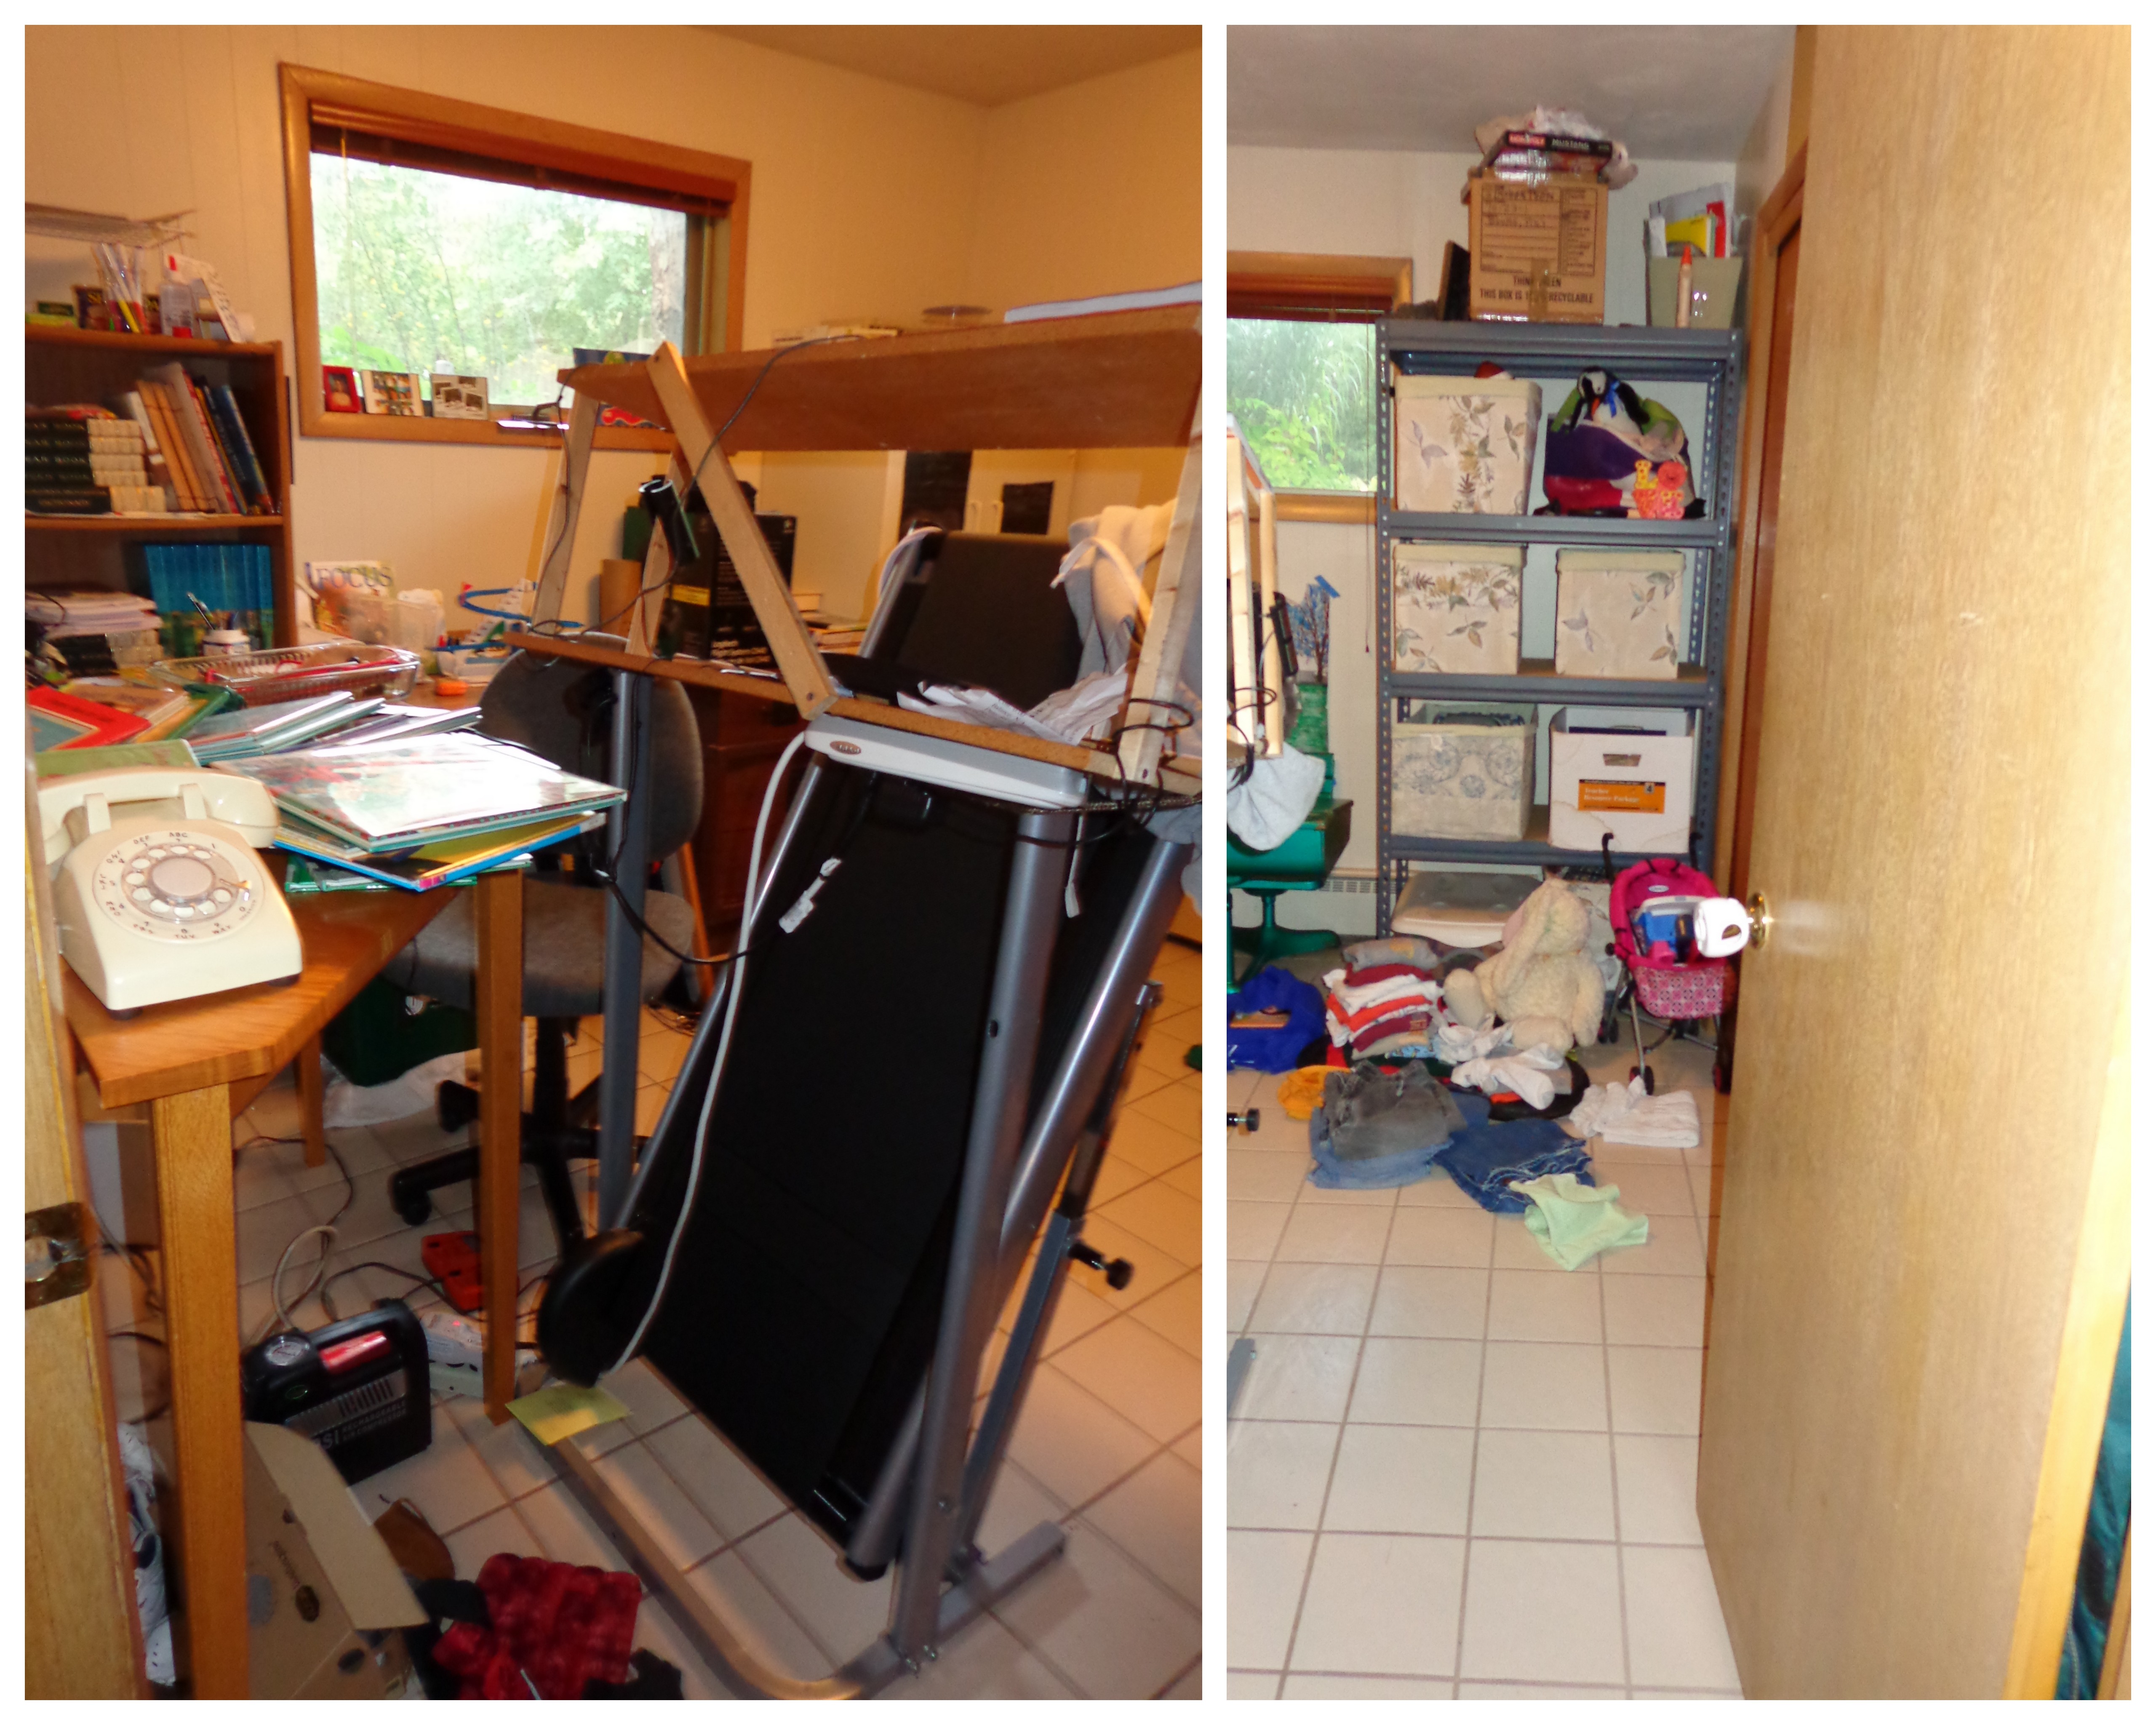
I don’t know about you, but I find that I can ignore chaos for a time. Then, suddenly, I’ll see it as if for the first time and I get a bee in my bonnet that says, “Must. clean. this. NOW.” Well, that bee was buzzing overhead. My plan was to:
– find a place to DH’s running clothing
– have a central location for all of the school supplies/books/etc.
– get rid of the unused table in the office
– make space in the closet for the totes
– move the toy library out of the office

This was one of those projects where one project created another and another. But, in the end, I had a nicely organized school room/office, the CD/stereo area in the kitchen got reorganized, and the living room toys got moved around. Anyway, this really wasn’t a complicated project, it just took time moving everything around.

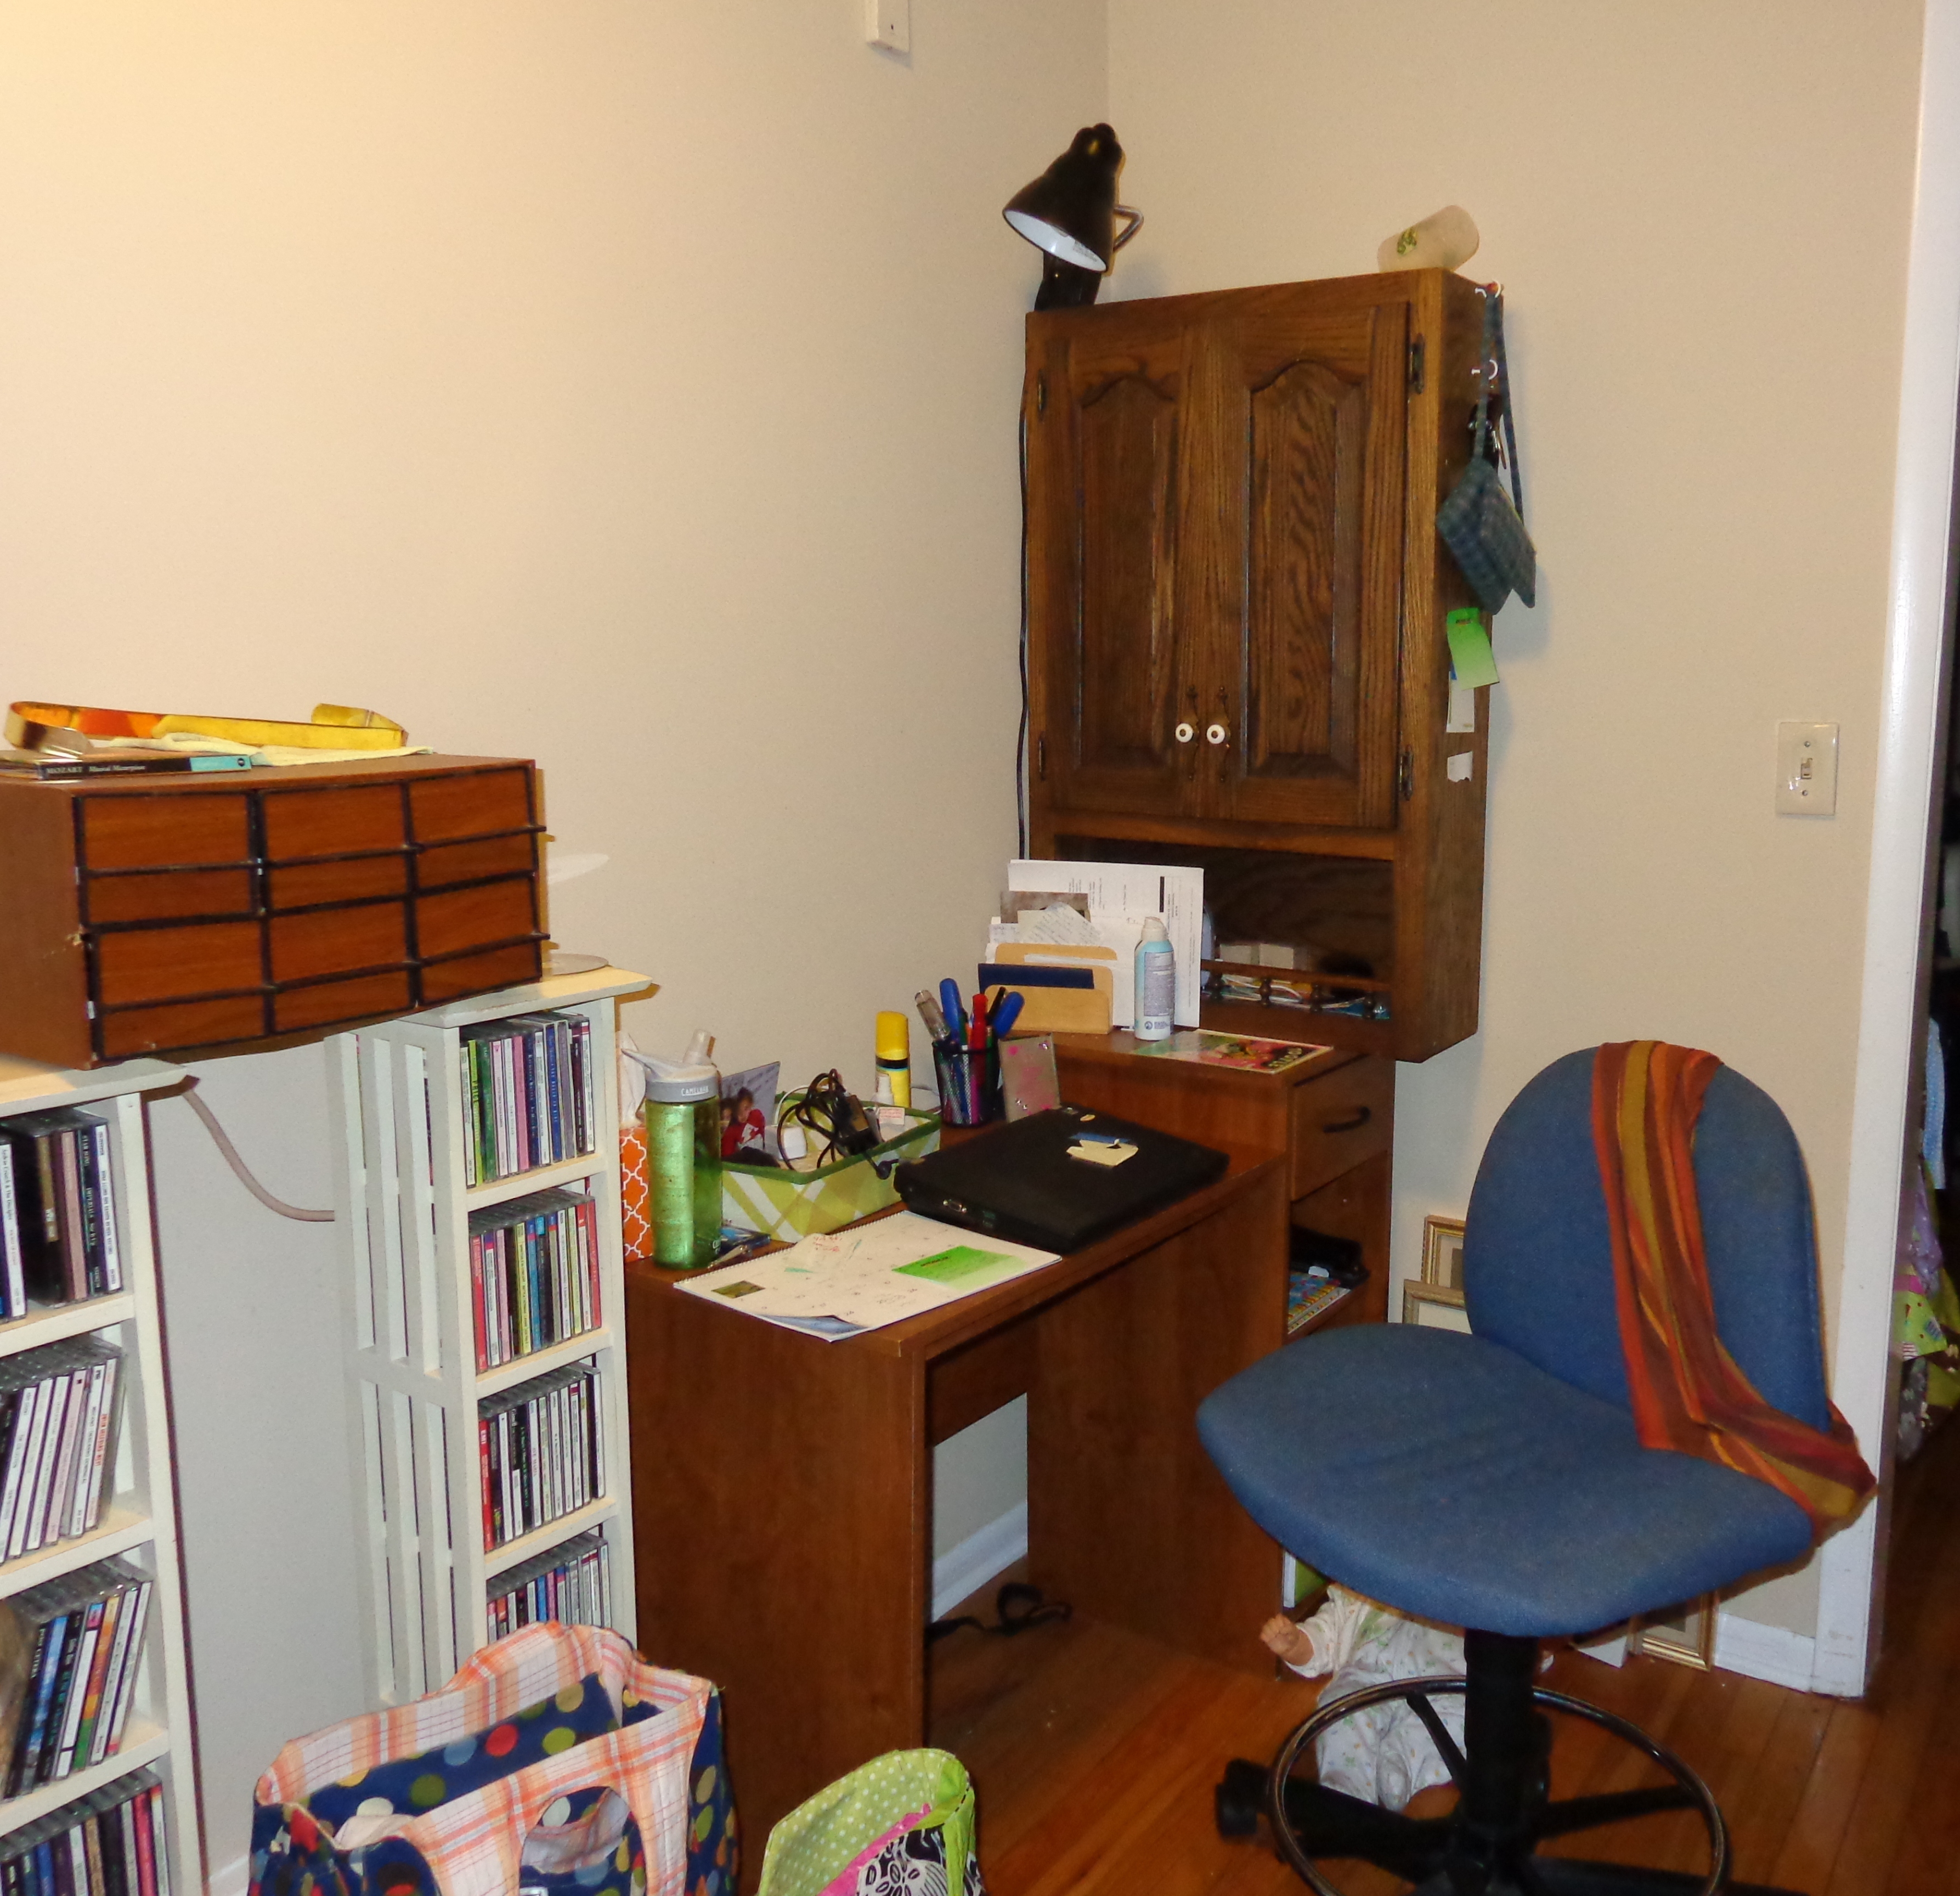
Here’s the after picture of the school room.

rick's office after

What’s that?  Oh, yes, there WERE desks in there before, you just couldn’t see them behind all of the mayhem.  This is a vastly improved learning environment, don’t you think?

Total cost: $39
Total time: 5 hours
 

Menu Planning

Years ago, I started writing out weekly menus before going to the grocery store. I was actually at a friend’s house for lunch and saw a dry erase board on her fridge with what she was having for lunch and dinner the whole week. I thought it was a very clever idea. I generally only planned dinner, and lunch would just happen. Now that DH is working from home all the time, I have to make more food for lunch, (rather than just eating leftovers or mac n’ cheese or PB &J) so it’s easier to plan out lunch and dinner. I’d been using a dry erase board for quite a few years. It worked fine, but didn’t look nice and it was small so the writing was crowded. After creating a schedule board, I got inspired to do something similar for my menus. The process was the same: fine a picture frame, paint the frame yellow, draw lines on the underside of the glass, cover the cardboard with pretty fabric . . . voila, menu board.

Menu board

It is sooo much neater than what I had going on before! And, I have extra space on the side for the extras I like to make: special breads, granola, dessert, etc. I opted to number the days of the week rather than using the actual names. This way, I don’t feel like I”m tied to having beans on rice on Monday just because it says Monday on the board. So far, it’s working like a charm. I’m not squinting to try and read the tiny writing, I have space to write out all parts of the meal (entree, veggie, dessert), and everyone else can easily see what’s on the menu. This is good for the babes, because they can go and either request a particular meal for that day, or they can prepare themselves to not like the meal! =)

This came together so quickly: from start to finish, it only took me about 30 minutes!

Next up: the message board.

Total time: 30 minutes
Total cost: $6

Schedule revisited

Back in January, the babes and I came up with a new daily schedule and posted it on the fridge. The schedule worked really well . . . .until we moved at the beginning of March . . . and then it all went to pot. By the time we got all settled, it was May, and DH went on two business trips. Then it was June and I was busy planning a birthday party. Then it was July and we were gone for the whole month. After 5 months of complete disorder, I was ready to get back on schedule. But it wasn’t as simple as just using the old schedule. We made a few changes in the schedule and then made a whole new schedule board. The old one was fine, but it didn’t allow for changes, and it certainly isn’t going to match the command center setup. Sooo, of course, I had to make a new one.

I found an old picture frame at Goodwill and sponged the frame itself with yellow paint. I didn’t bother to prime the frame, so I did a quick coat of polyurethane. I’m pretty sure that’s not what polyurethane is for, but it worked! We glued fabric onto the cardboard backing to provide a nice background for the schedule. Then, the fun began, trying to find a permanent marker whose color matched the color scheme AND would show up on the glass. I settled on purple for the lines and a dark blue for the words. I had a small stroke of genius and drew the lines and wrote the headings on the underside of the glass. That way, when I want to change something, I don’t end up erasing the lines. (Erasing entails using a damp paper towel and a wee bit of elbow grease.) The frame had more space than I needed for the actual schedule, so I included a section at the bottom for “Things to do today”.

new schedule

A close up of the painting detail, since you can’t really see much in the terrible picture above. The house is so dark, with the kitchen having very little natural light, it’s nigh unto impossible to get a decent shot!
detail of schedule

This is actually the second week of doing the new schedule, but I can say that it went MUCH better yesterday (the first day that the schedule was posted). Even though not everyone in our family knows how to read yet, there’s something about having a tangible schedule to look at and refer to that really helped us stay on track. It wasn’t perfect, but I’m already feeling more organized in the day.

Next up, a menu planning board.

Total time: 1 hour
Total cost: $3

Laundry, dishes and paint

It’s been almost two months of silence here on my little blog. Have no fear, I have been busily working on organizational projects. If you recall from my last post, eons ago, I’m now to the “Man, this project is going to take FOREVER!” stage. The last week of June saw me feverishly working on repainting my desk. It was just a plain, old, ugly and cheapo desk. It needed help.

command center desk before

Not only that, since we are renting, I can’t paint the wall or the uninteresing cream-colored cabinets. So, painting the desk was the only option. I knew this would be a big project, but I don’t think I really had any idea how long it would take. I think I painted every day for an entire week! Fortunately, the weather mostly cooperated and the babes had fun hanging out in the front yard while I painted away.

The first step was to prime the desk. I used Zinsser oil-based primer, which claimed to stick to anything without needing sanding . . . .my kind of primer. The next step was to actually paint. I think I ended up doing 3 coats. Since the primer was white and the paint was dark, the white just kept showing through. So, three coats later, I was finally satisfied. The final step was to apply polyurethane to protect the finish. I managed to get six coats on before running out stamina and time. But, I met my goal of finishing before going on our trip. I wanted the polyurethane to cure for a good long time before putting it into use.

command center desk after

I’m not head over heels about how it turned out, but I do quite like it. I love the purple, the teal is only so-so. But, I was working with whatever mistint colors were available, and it’s much better than before. I think once the other pieces of the desk area get put in place, it’ll all come together . . .at least I hope it will!

ETA: I can’t believe I forgot to give a shoutout to my friend Deb! She had all sorts of great tips for how to re-paint furniture and let me ask her a billion questions! Thanks, Deb!!

Total cost: $36
Total time: 24 hours (not including drying time)

My other project sort of happened by accident . . it wasn’t something that I thought needed organizing. We just returned from a month long trip where we rented a 1000 sq foot two bedroom apartment that was 1.5 times smaller than the house we currently live in. It was a good exercise in figuring out what we do and don’t actually need and in being very efficient in how we used the space. Upon our return, the babes and I went through all of their toys and books and got rid of a box of books and two large trash bags of toys. (Yes, that is me that you see jumping up and down for joy!) I also managed to survive and entire month with no dishwasher. The last time I didn’t have a dishwasher, I thought I was going to lose my mind. It seemed like I was spending all of my time doing dishes. This time around, it seemed to work much better, and I think the reason is twofold: 1) the sink was small, so only a certain amount of dishes would fit 2)I washed dishes as they got dirty, so things didn’t seem to pile up as much. So what’s the take away lesson here? Do the dishes more often. My new plan is to not let the sink get full of dishes and to wash as I go. We’ll see if works out!

The other thing about the apartment was that the washer and dryer were down the hall. Generally when I do laundry, I have two baskets that I fill: one for DH and me, and one for the babes, with each babe getting one corner for their stuff. In my head, it makes it easier for DH when he’s putting things away. (I don’t actually know whether or not it makes a difference.) The hanging clothes get hung up on a rolling rack, organized by person. This wasn’t at all an option while in the apartment. So I ended up folding the clothing in the laundry room, and then carrying the hang-up stuff to the apartment and hanging it there. After about three weeks, I had an epiphany. Hanging the clothing in the apartment and putting it away right away took no more time than hanging it up and putting it on the clothing rack. This may seem totally obvious to all of you, but it just didn’t occur to me. I was quite sure that it would be an inefficient use of time to have to carry each load of laundry upstairs to hang it up rather than staying in one place.

Anyway, so I’ve revamped my laundry system. I’m still hanging things up on the rolling rack. But, instead of folding everything in the laundry room, I take it upstairs and fold it in one of the rooms and then put it away from there. It works like a dandy! Not only do I get to sit down while I’m folding the laundry, I can work with the babes to teach them how to put their laundry away neatly and the laundry gets put away in a timely fashion. (It’s hard for DH to find the time to put away 10 loads of laundry . . . if the babes are away, he’s playing with them, if they are asleep, well, then they are sleeping and their rooms aren’t available for laundry-put-awayage. It usually would take 2-4 days for the laundry to get put away, and I’d end up digging through baskets trying to find things.) This is a win-win for everyone.

Sooo, we are now a week bit more organized and efficient in the homemaking department! Hip hip hooray!

DIY thread rack

Almost exactly three years ago, I made a thread rack and blogged about it on my other blog, A Diva Moment, here. It was a great thread rack and it served me well, until I had waaay more thread than space. I kept wanting to make another one to accomodate the extra thread. But then I had a baby, and life happened and then we moved . . . . the thread rack did not get made.

I recently finished organizing my new sewing room, and was ready to tackle the thread dilema. The new room is only a bit smaller, but it has LOTS of shelving, which is amazing! That also means that there exists a shortage of free wall space, which was cramping my “where shall I put my thread” style. I decided to scrap the old thread rack and make a totally new one. My inspiration came from the blog The Creative Homemaker You can see Heather’s version here.

This ended up being a rather big project, involving a bit of carpentry and learning how to use a new power tool. I bought a 4 x 2 sheet of peg board. We had a whole slew of 1 x 2 furring strips laying around, so I put them to good use. I cut two pieces that were 4 feet long and screwed those vertically onto the pegboard. I then cut 13 pieces that were 22 1/2 inches long and screwed those in horizontally at even intervals. (I factored in 2 inches for each spool, plus a 1/2 inch head space, plus 5/8 inch for the board. So from the top, I measured and marked 2.5 inches, and then another 5/8 inch from there. Then another 2.5 inches, and so on and so forth.) Because of the nature of the wood, it was necessary to predrill the holes. Sure, the drywall screws could have taken the board, but then the board would have split . . .not really what I was looking for.

Anyway, so once that was done, the real fun began . . . pounding in 195 nails. Oy! That took forever! Oh, I forgot one important piece. The thread rack is going up over a light switch, so I had to cut out a piece of the pegboard. Here’s where I used a new power tool . . . a jigsaw. It’s now my new favorite tool! I had no idea how to use it and we didn’t have a blade, so I took it in to Lowes’ and said, “Can you tell me what kind of a blade I need for this saw? And could you show me how to use it?” I’ll admit that the hole is not very precise, but there is a hole in the general area where it was needed, so I consider that a successful first attempt!
thread rack, empty

And so, the thread rack is done . . . . . and HEAVY! It’s anchored into a studs in about 4 places, so it’s definitely not going ot come crashing down. It will hold 195 spools of thread with their corresponding bobbins on the front! I’m glad I added the extra rows. I had NO IDEA I had so much thread! Almost every single spot is filled! Now that I’ve filled it up, I’ve realized that I should have done two things differently.
1) The rows should’ve been a bit further apart. Everything fits, but you have to be very careful when removing thread so as to not knock anything off of another shelf
2) The nails I used were too short, or I hammered them in too far or both. They just aren’t long enough to securely hold the bobbin. Don’t get me wrong, the bobbins fit, but there isn’t much wiggle room . . .one little bump and they go sailing.
Oh well. I’m not a carpenter and given that this was one of my first biggish carpentry projects, I’m okay with how it turned out.

Here’s the thread rack full, to the brim!
thread rack full

thread rack bobbins

And what became of the old one? Well, did I mention that I have alot of thread? Yeah, that thread rack is now filled with what I call random thread. Spools that are almost empty, or have 2 or 3 colors on them or are wound all crazy. I’m keeping it so that the babes can use it.

old thread rack

Closet organization

I’ve had this project done for about two weeks and I thought I’d already posted about it. Clearly, that only happened in my head!

We have alot of little people at our house, so they get to share rooms and closet space. They were always fighting over space: “Your shirt is on MY side!” and so on. I decided to make little closet dividers to help mitigate the fighting. I was going for something like this from the Container Store. They’re only 99 cents each, but they looked so BORING, especially for a kid’s room. So, I made my own. No, they don’t look as neat and polished as the ones from the store, but they were FREE and the babes got to work on them during their crafting time. This means they learned tracing skills, cutting skills and learned how to use a paper cutter. (No, not the guillotine style paper cutter!) Win-win in my book. Oh yeah, and they have made it easier for DH to put the clothing away and the babes don’t fight over their closet space anymore!

So how did we make them? First I made a template, and then had the babes use the template to trace onto more cardboard. (We used cereal boxes since we have a plethora of empty boxes. We go through like 2 boxes of cereal per week!) Once the shape was on the cardboard, the babes cut them out. Then I had them trace the same shape onto paper. Things started falling apart here. Apparently, they aren’t all that adept at cutting straight. So we ended up with papers that were totally different sizes from the cardboard . .. not exactly what I was hoping for. I said I would just do it myself, which of course sent them into a crying and wailing jag. What to do? What to do? Have them glue the paper on first and THEN use the paper cutter to trim off the excess. This worked like a charm!

The final steps were to label the dividers and decorate them. I used a combo of stickers and handwriting to label them and the babes decorated them to their liking. Wanna see how they turned out?

Up close and personal
closet organizer close up

In use
closet organizers

Total cost: Free
Total time: 1.5 hours

Day 305 – October 18

Today was all about banana bread. Well, the entire day wasn’t about banana bread. Actually, I didn’t even think about banana bread until about 8pm tonight. So maybe I should start over.

After the babes were in bed tonight, I got a hankering for banana bread. Fortunately, I had bought a big bunch of super ripe bananas the other day, so I was all set. I did a quick search and found three recipes, which I pinned to my bread board. I ended up only making two of the recipes. I tried the Apple Butter Banana Bread from Recipe4Living’s blog, and the Chocolate Chip Coconut Banana Bread from the blog Spoon Fork Bacon.

I made 6 mini-loaves of the coconut version, and one regular sized loaf of the apple butter. My favorite was the chocolate chip version because it has chocolate! The coconut didn’t really add any extra flavor, it was more just a change in texture, so I’ll just skip that next time. The apple butter banana bread was really pretty good, too. It was spice-y (as in, nutmeg, cloves, etc) and had a really nice flavor. It just didn’t stand a chance against the chocolate chip version!

Day 255 – August 28

Sometimes, I just don’t feel like making dinner. At least nothing that requires too much effort. Tonight was one of those nights. My first thought was to have bread with peanut butter and applesauce. Then I remembered seeing this smoothie recipe on Pinterest, and decided to go with that.

I made a few changes.
– full fat regular plain yogurt
– 4-6 T of honey
– 2-4 T of powdered sugar
– 2-3 T of cocoa powder
– 1 t cinnamon
– 1 t vanilla extract

It was pretty good. The babes drank it up with no complaints. The person that pinned it before me claimed that it was very filling and kept them going all morning. Maybe it’s because I’m incubating a human, but this definitely didn’t keep me full for long. I’ll try it again in the morning to see how it works out. All in all, it worked out great, the kids were full, and it was healthy! Win-win!

Day 225 – August 3

For some reason, I was actually in the mood to cook, and I tried out a few new veggie recipes that had been pinned on my Veggies board. Boy am I glad I tried them out . . . they are delish!

The first was sauteed corn with basil butter. I used margarine since I didn’t have any butter. I’m sure it would have been even more amazing with real butter . . . more fattening, too! This was mega easy to make, that’s a winner in my book.

The second recipe was braised zucchini with cherry tomatoes. The person that I pinned this from claimed it was the best zucchini of your life. I’m not sure I would go that far, I mean, it’s zucchini. But, it was pretty good. The kids were less than excited about the dish, but I’m guessing that’s because it was new? Or maybe they just didn’t like them. In any case, I only used 2 zucchinis and doubled the amount of garlic (we like garlic around here). I also used regular red cherry tomatoes since I’ve never actually seen the golden ones.

And a little pic of our dinner, filled with the bounty of summer!

Day 167 – June 6

I tried out three new recipes today, with varying amounts of success.

First . . . .macaroni salad, pinned on my Entrees board. If you can believe it, I’ve never made macaroni salad before. Honestly, I have no idea why. We LOVE pasta around here, buy it by the cartful. And the salad was super easy to make. I’ll definitely be keeping this recipe in the rotation. The nice thing is that you can vary the flavor by changing just a few ingredients, so you don’t end up with the same old same old.

Second . . . I happened to see these fruit flavored water recipes on pinterest today, and thought they’d be perfect for DS1’s birthday playdate. They were super easy to make and they turned out pretty good. I actually just used this as inspiration and did my own thing: strawberry-lime and watermelon-sage. It’s probably not something I’ll keep in the fridge at all times, but it’ll be fun to experiment on occasion.

Finally, I decided to make some cupcakes for DS1’s birthday. Someday, I’ll learn to use liners when making cupcakes. Yep, they turned out yummy . . . too bad I couldn’t get them out of the muffin tins in one piece! Needless to say, I didn’t serve them at his playdate. Total bummer, because the gingerbread buttercream frosting looked like it would be amazing! (When the cupcakes were a flop, I didn’t bother making the buttercream.) Fortunately, we were still able to enjoy the cupcake crumbs with ginger whipped cream for DS1’s birthday dinner. So, I guess all was not lost!

Post Navigation