DIY thread rack
Almost exactly three years ago, I made a thread rack and blogged about it on my other blog, A Diva Moment, here. It was a great thread rack and it served me well, until I had waaay more thread than space. I kept wanting to make another one to accomodate the extra thread. But then I had a baby, and life happened and then we moved . . . . the thread rack did not get made.
I recently finished organizing my new sewing room, and was ready to tackle the thread dilema. The new room is only a bit smaller, but it has LOTS of shelving, which is amazing! That also means that there exists a shortage of free wall space, which was cramping my “where shall I put my thread” style. I decided to scrap the old thread rack and make a totally new one. My inspiration came from the blog The Creative Homemaker You can see Heather’s version here.
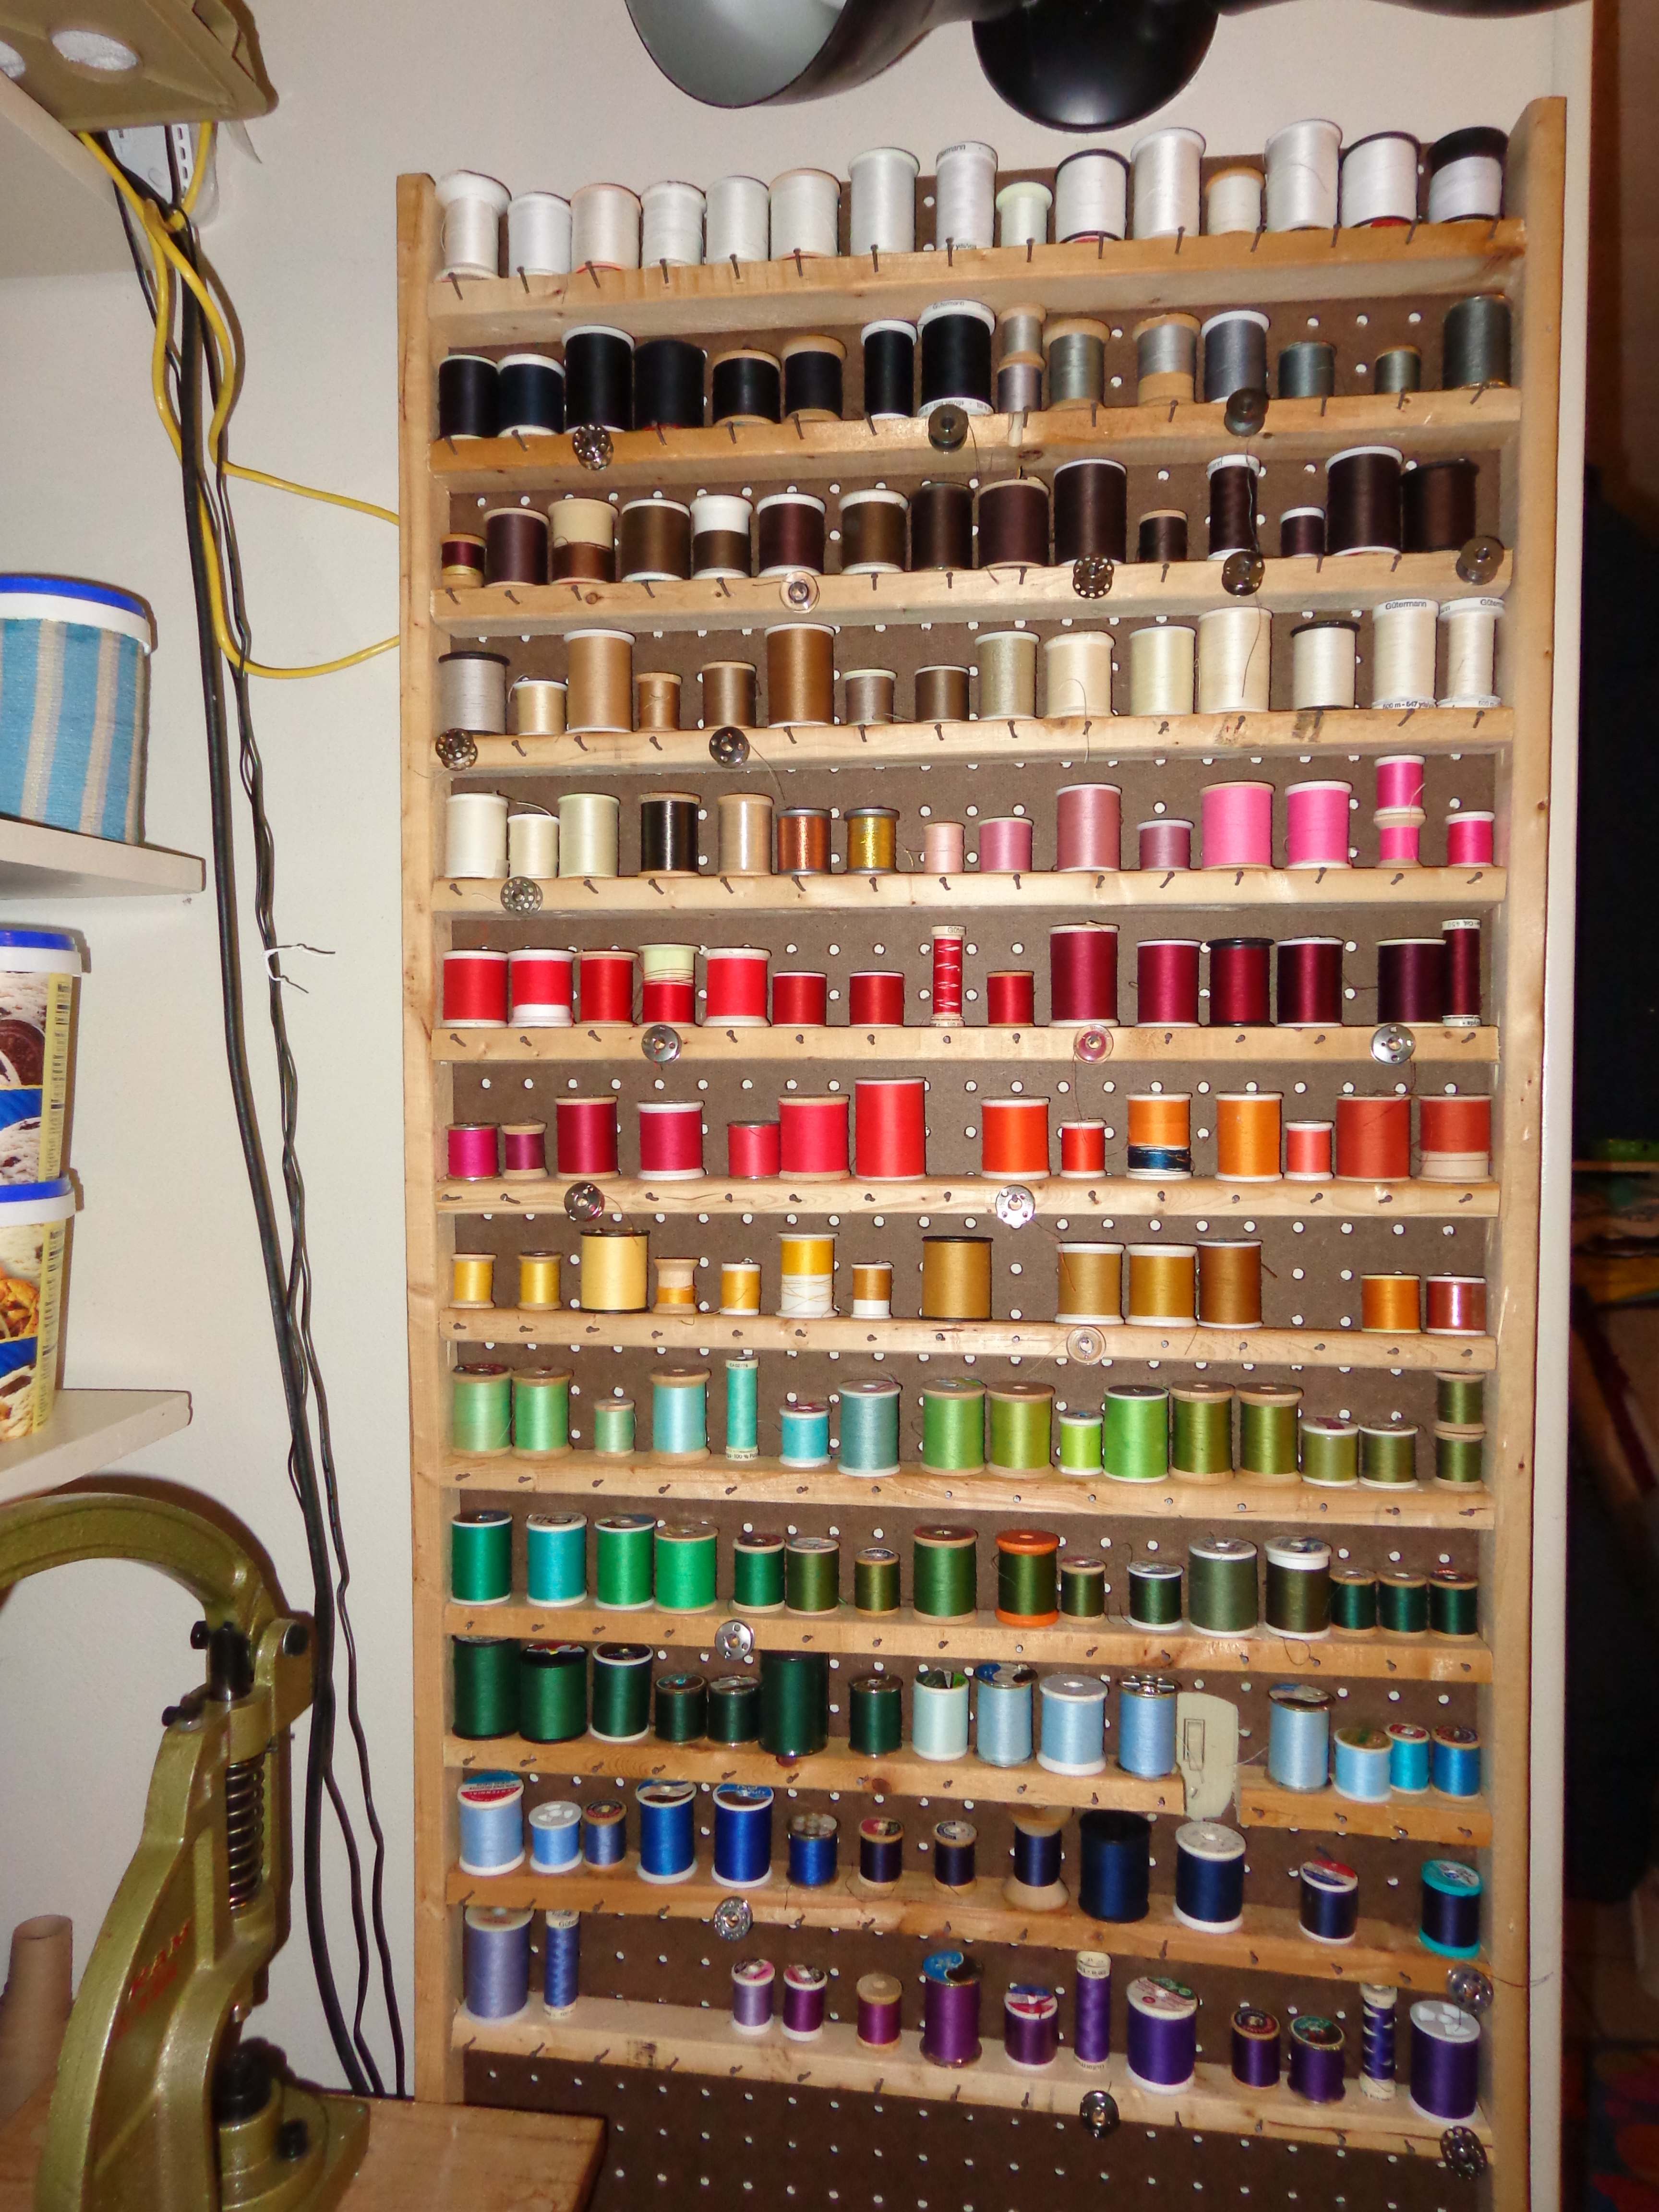
This ended up being a rather big project, involving a bit of carpentry and learning how to use a new power tool. I bought a 4 x 2 sheet of peg board. We had a whole slew of 1 x 2 furring strips laying around, so I put them to good use. I cut two pieces that were 4 feet long and screwed those vertically onto the pegboard. I then cut 13 pieces that were 22 1/2 inches long and screwed those in horizontally at even intervals. (I factored in 2 inches for each spool, plus a 1/2 inch head space, plus 5/8 inch for the board. So from the top, I measured and marked 2.5 inches, and then another 5/8 inch from there. Then another 2.5 inches, and so on and so forth.) Because of the nature of the wood, it was necessary to predrill the holes. Sure, the drywall screws could have taken the board, but then the board would have split . . .not really what I was looking for.
Anyway, so once that was done, the real fun began . . . pounding in 195 nails. Oy! That took forever! Oh, I forgot one important piece. The thread rack is going up over a light switch, so I had to cut out a piece of the pegboard. Here’s where I used a new power tool . . . a jigsaw. It’s now my new favorite tool! I had no idea how to use it and we didn’t have a blade, so I took it in to Lowes’ and said, “Can you tell me what kind of a blade I need for this saw? And could you show me how to use it?” I’ll admit that the hole is not very precise, but there is a hole in the general area where it was needed, so I consider that a successful first attempt!

And so, the thread rack is done . . . . . and HEAVY! It’s anchored into a studs in about 4 places, so it’s definitely not going ot come crashing down. It will hold 195 spools of thread with their corresponding bobbins on the front! I’m glad I added the extra rows. I had NO IDEA I had so much thread! Almost every single spot is filled! Now that I’ve filled it up, I’ve realized that I should have done two things differently.
1) The rows should’ve been a bit further apart. Everything fits, but you have to be very careful when removing thread so as to not knock anything off of another shelf
2) The nails I used were too short, or I hammered them in too far or both. They just aren’t long enough to securely hold the bobbin. Don’t get me wrong, the bobbins fit, but there isn’t much wiggle room . . .one little bump and they go sailing.
Oh well. I’m not a carpenter and given that this was one of my first biggish carpentry projects, I’m okay with how it turned out.
Here’s the thread rack full, to the brim!

And what became of the old one? Well, did I mention that I have alot of thread? Yeah, that thread rack is now filled with what I call random thread. Spools that are almost empty, or have 2 or 3 colors on them or are wound all crazy. I’m keeping it so that the babes can use it.


That is awesome!