Menu Planning
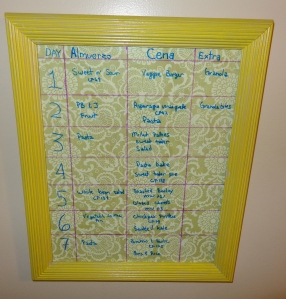
Years ago, I started writing out weekly menus before going to the grocery store. I was actually at a friend’s house for lunch and saw a dry erase board on her fridge with what she was having for lunch and dinner the whole week. I thought it was a very clever idea. I generally only planned dinner, and lunch would just happen. Now that DH is working from home all the time, I have to make more food for lunch, (rather than just eating leftovers or mac n’ cheese or PB &J) so it’s easier to plan out lunch and dinner. I’d been using a dry erase board for quite a few years. It worked fine, but didn’t look nice and it was small so the writing was crowded. After creating a schedule board, I got inspired to do something similar for my menus. The process was the same: fine a picture frame, paint the frame yellow, draw lines on the underside of the glass, cover the cardboard with pretty fabric . . . voila, menu board.
It is sooo much neater than what I had going on before! And, I have extra space on the side for the extras I like to make: special breads, granola, dessert, etc. I opted to number the days of the week rather than using the actual names. This way, I don’t feel like I”m tied to having beans on rice on Monday just because it says Monday on the board. So far, it’s working like a charm. I’m not squinting to try and read the tiny writing, I have space to write out all parts of the meal (entree, veggie, dessert), and everyone else can easily see what’s on the menu. This is good for the babes, because they can go and either request a particular meal for that day, or they can prepare themselves to not like the meal! =)
This came together so quickly: from start to finish, it only took me about 30 minutes!
Next up: the message board.
Total time: 30 minutes
Total cost: $6
